The Smart Electric Fence Grid
Portable Electric Fences (construction)
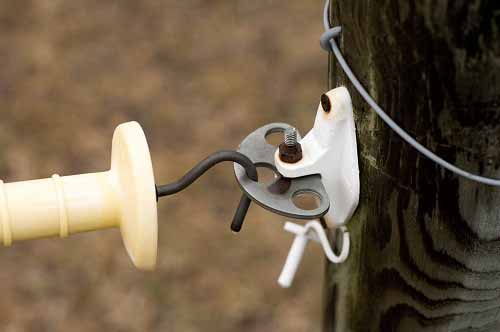
Image Credit: paul_houle
The previous article (Part III) in this Smart Electric Fence Grid series explained how to use portable electric fences to subdivide your broad permanent electric fence corridors into daily grazing slices.
This page will focus on some of the key construction tips to remember when using portable electric fences to subdivide your permanent electric fence grid into daily grazing slices.
Portable Electric Fence Construction Tips:
The portable electric fences used in your Smart Electric Fence Grid are not intended to function as a stand-alone unit. They are simply the rungs of a ladder; short temporary cross-fences used to ration out the grass in your permanent pasture fence corridors.
As I explained in the Part III - you only need to construct three temporary portable electric cross-fences to manage your entire grazing rotation:
The current day's front fence,
The current day's back fence,
The next day's front fence.
And you only need to move one of these temporary fences each day!
When you move the herd to the next day's grazing slice, the current front fence becomes the next day's back fence - it does not need to be moved. The old back fence is now obsolete. Take it down and set it up as the next day's front fence.
So, let's have a look at the individual components of your portable electric fences and how to set them up to manage your daily pasture rotation...
How many wires?
Since electric fences function as a psychological barrier, it is important to train your cattle to electric fencing before turning them loose in your pastures, but once trained, cattle only need a single electric wire to contain them effectively. Horses also only need a single wire, once trained to electric fences. Sheep and pigs often need additional wires, but they are not the subject of this article.
Wire Height
The portable electric fence wire should be hung approximately 30 to 34 inches from the ground - the same as the permanent electric fences you built to create your broad pasture corridors. Most step-in posts are pre-made with an insulator fixed at this ideal height. Fiberglass posts have adjustable insulators attached to them so you can move the wire up or down on the post, which is ideal when grazing through a heavy snow pack that requires a taller wire to keep the wire clear of the snow's surface.
Recommended wire type for different seasons
Portable electric fence wire comes in two primary types - poly-wire or poly-tape. They both weave wires between nylon or plastic threads to give strength to the wire and make it visible. Polytape is wide and flat. Polywire is a thin round rope-like braid of wire and nylon or plastic thread.
Poly tape is more easily visible due to its flat, wide design, but during frequent use (i.e. during daily pasture moves) it can get hopelessly twisted. Poly tape is great for working with horses, which tend to need more obvious, easily-visible wires to keep them from running through the wires. But when working with cattle I prefer poly wire because you don't need to worry about tangles and twists, which makes it significantly faster to use.
Poly-wire and poly tape both typically come two colors - orange or white. If you live in an area that receives snow, use the orange poly-wire so it will be visible to your cattle when there is snow on the ground. Although white is slightly more obvious against green grass, once your cattle are trained to electric fencing they will respect either color equally well as long as there is no snow on the ground. But once it snows the white poly-wire becomes virtually invisible, so unless you want to carry two separate inventories of poly-wire, it makes sense to stick with orange poly wire year-round.
The most important difference between different poly wire and poly tape products on the market is their electrical conductivity. Electrical conductivity in your poly-wire is based on:
- Number of wire filaments within each braid (most quality electric fence suppliers produce polywire with between 6 and 9 wire filaments);
- The thickness of the wire filaments within each braid;
- Type of metal used for the wire filaments (i.e. stainless steel, aluminum, etc.);
- And the number of inter-connections used to connect individual wire filaments so that power is easily transfered between wire filaments in case one filament breaks.
Check the resistivity of the portable electric fence wire that you purchase to ensure that it will maintain sufficient current in the wire over the maximum distance (maximum corridor width) that you expect to use in your pasture rotation.
Not all portable electric fence wires are made equal.
Cheap polywire or polytape won't carry current very far and is prone to breakage. Even if the poly wire braid remains whole, if the little individual wire filaments inside the braid break, then you won't have any current. Make sure you purchase a high-quality product that will last a long time over constant daily use.
Portable posts
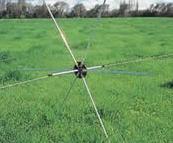
Step-in portable posts, such as the pigtail post shown in the image on the left, are much faster and easier to use than fiberglass posts that require a hammer and impact cap to set up. However, during the winter when the ground is frozen the step-in posts will not work.
During the winter fiberglass posts can usually still be pounded into the
ground with a hammer even when the ground is frozen as long as they are
installed in undisturbed snow-covered pastures. The undisturbed snow
cover keeps the frozen ground sufficiently pliable that the fiberglass
posts will penetrate sufficiently to stand upright. (These temporary
fence posts only need to penetrate the soil surface by an couple of
inches to remain upright in extremely firm soil.)
However, once the cattle disturb the snow cover, the frost will harden in the ground and the porous top layer of the sod mat will be compressed by the animal traffic so the portable fiberglass posts will no longer pound into the ground. Carry a cordless drill with a 1/2" bit to drill your portable fiberglass posts into the ground, or switch to using free-standing posts like the tumblewheel post sold by Gallagher Animal Management. You can learn more about how to manage your portable electric fences during the winter in Part VI and VII of this article series...
Geared Reels
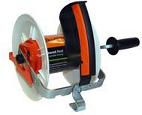
Geared spools/reels are an absolutely essential component of your portable electric fencing equipment. They are designed to hold your poly wire or poly tape and make it extremely quick and easy to roll up your temporary poly-wire cross-fences in your electric fence grid. The gearing is designed to lock the spool in place so it does not unravel unless you want it to. This allows you to hang the reel off of your permanent high-tensile electric fence corridors using the metal hook attached to the handle of the reel, visible at the base of the image on the right.
Powering Your Portable Electric Fences
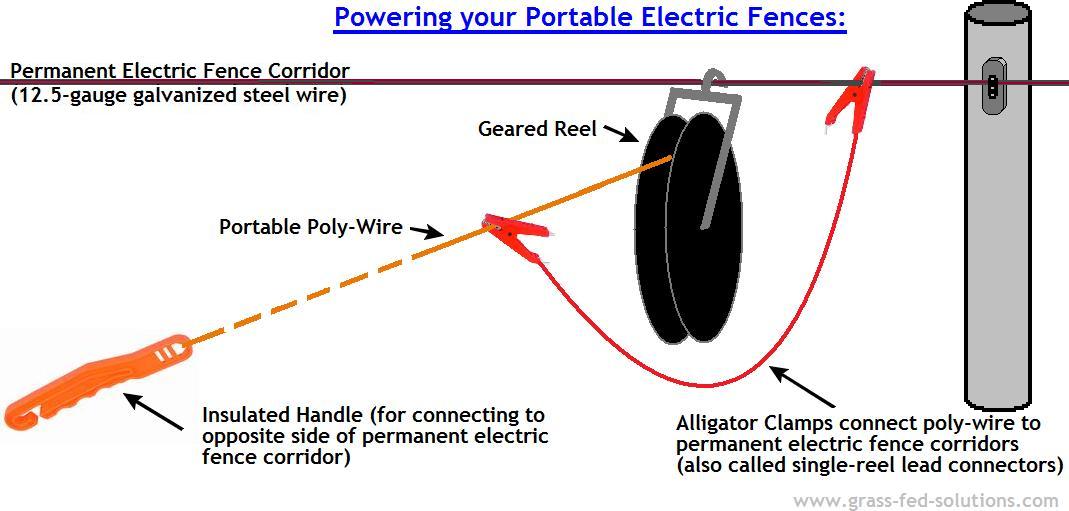
Hang your geared reel off of your permanent electric fence corridors. Use alligator clamps (single reel lead connectors) to connect your temporary fences to your permanent 12.5-gauge galvanized steel electric fences. Use an insulated handle to connect the other end of the portable electric fence to the opposite side of the pasture corridor so that the fence is NOT hot once you unhook your alligator clamps and begin rolling up the wire on your geared reel.
While the metal hook on your geared reel provides some power to your portable electric cross-fence, you should always use an alligator clamp (also called a lead connector) to create a good quality electrical connection between the portable electric fence and the 12.5 gauge permanent electric fence corridors.
Use an insulated handle on the far end of your portable electric fence so the fence is only powered from one side (at the geared reel). This ensures that the portable fence loses power once you disconnect the alligator clamps and geared reel so you can roll up the polywire without getting shocked. In winter you may want to switch to a handle that does provide power to your portable electric fences so that you power your poly-wires from both ends to maintain a higher voltage on your temporary fences. Follow the link to learn more about electric fencing in the winter.
The Electric Fences and Rotational Grazing chapter of my book, Grass-fed Cattle: how to produce and market natural beef, provides a comprehensive overview of how to install and use your permanent and portable electric fences, as well as how to integrate your livestock water system into your electric fence installation. The summer grazing plan in the example pasture rotation and farm plan shows how portable electric fences are being used inside a smart electric fence grid to create a daily rotational grazing program.
So, now it's time to look at how to integrate cattle water into your electric fence grid, which I'll do in Part V of this article series.
Continue to:
Part V of the Smart Electric Fence Grid
Related Articles:From the Smart Electric Fence Grid series:
Other articles:
(Disclosure: I get commissions for purchases made using Amazon links in my post.) And when you're ready to start planning your cattle farm, check out my book: Grass-Fed Cattle: How to Produce and Market Natural Beef. Use the links below to explore my book and read reviews on Amazon: 
|


